原料
低筋面粉 90g, 蛋黄 3个, 细砂糖 20g, 蛋白 3个, 细砂糖 40g, 开心果碎 适量, 糖粉 适量, 青色红色草莓, 樱桃, 蔷薇玫瑰及两种忘了名字的花及花蕊, 花叶/蔷薇玫瑰叶子, 提琴插牌, 丝带, 奶油奶酪 120g, 酸奶 80g, 草莓 200g, 细砂糖 50g, 牛奶 80g, 吉利丁片 2片(5g一片), 鲜奶油 50g, 细砂糖 20g
步骤
1草莓慕斯:奶油奶酪+50g细砂糖隔热水搅拌均匀

2酸奶搅拌均匀

3丁片先用冰水泡软,然后捞出沥干多余水分

4将泡软的吉利丁片,加入到煮热的牛奶中,搅拌至融化;然后将牛奶吉利丁溶液,倒入步骤2的乳酪中

5草莓洗净去蒂,切块,放入搅拌机中,加入一点点水(配方外,因为不加水,草莓不易打碎,加一点水,能打碎就可以),将草莓打成泥

6将打碎的草莓浆加入搅拌盆中拌匀

7鲜奶油+20g细砂糖打至粘稠,加入搅拌盆中翻拌均匀。(我没打,直接倒的鲜奶油,事实证明应该打的,我的有些稀了,不该偷懒的,别学我,打吧~~~),这样草莓慕斯糊就做好了,放入冷藏室保存

8制作蛋糕片及围边:分离蛋黄和蛋白,蛋黄+20g细砂糖打至粘稠

9蛋白分3次加入细砂糖,打至捞起能形成弯钩

10将蛋黄糊倒入蛋白中,用橡皮刮刀翻拌均匀

11分两次筛入低筋面粉,用橡皮刮刀翻拌至均匀,完全看不到干粉

12用0.5cm-1cm圆形花嘴,在不沾垫上斜着挤出若干个竖条,高度约6,7厘米,宽度依据自家的烤盘宽度灵活把握,这些竖条,要足够你模具围边

13在另一个烤盘上挤出或直接倒上2个圆形面糊,不能太小,特别是其中一个,要足够蛋糕垫底,切记

14烤好后,根据模具的大小,你的想法,把围边裁剪成适当的高度,一般模具裁剪成约4cm左右

15一片心型也用模具刻出来

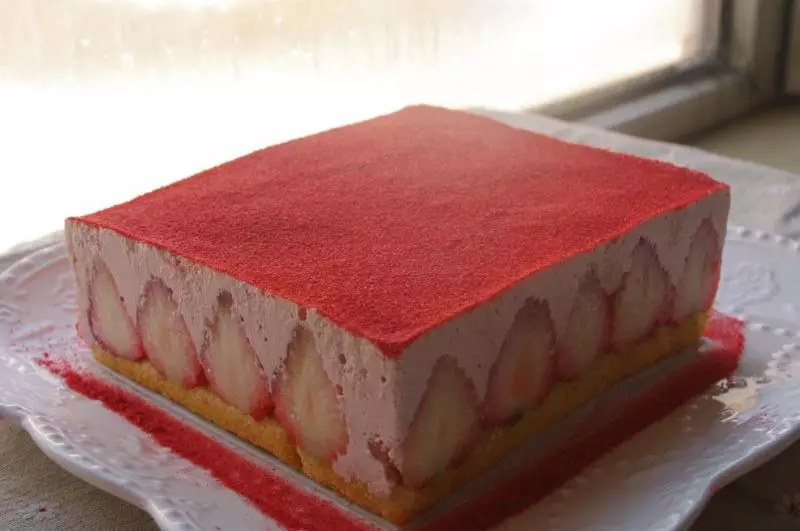
16模具最好放在一个硬板上,然后铺一层保鲜膜之类的东西,蛋糕围边分两片,先围在模具内部,衔接之处不要有缝隙~~~因为围边占据了一定的空间,所以我们刚才用模具刻出来的心型肯定是大了,所以需要再用剪刀把心型修剪的小一点,但不能剪狠了,以免过小,稍大一些比较好,这样铺在地下,会跟四周衔接的紧密

17倒入慕斯糊,到模具一半的位置,然后铺上一个较小的心型

18最后,把慕斯糊倒满模具,抹平表面,冷藏1夜。第二天,用吹风机吹吹四周,小心脱模