原料
巧克力: 100克, 黄油: 30克, 鸡蛋: 2个, 低筋面粉: 30克, 泡打粉: 1克, 白砂糖: 30g, 盐: 1克
步骤
1我们先来做巧克力酱:100g巧克力和30g黄油放入小碗中隔热融化(也可以放入微波炉融化),放置一边待用。

2做蛋糕要用到鸡蛋和面粉哦,接下来就开始打鸡蛋啦!准备一个较大的碗,打入2个鸡蛋,加入30g白砂糖打散。

3再倒入已经融化的巧克力黄油溶液,搅拌均匀。(这样巧克力味的鸡蛋液就做好啦!)

4再倒入已经融化的巧克力黄油溶液,搅拌均匀。(这样巧克力味的鸡蛋液就做好啦!)

5接下来筛入30g低筋面粉和1g泡打粉,加入1g盐(记住面粉、泡打粉都是干性食材,一定要最后加才不容易结块哦。加盐为了和甜味形成鲜明的对比,会更加突出甜味也会增加层次感一点点就可以啦)。

6把它们翻拌均匀,搅拌到无颗粒。

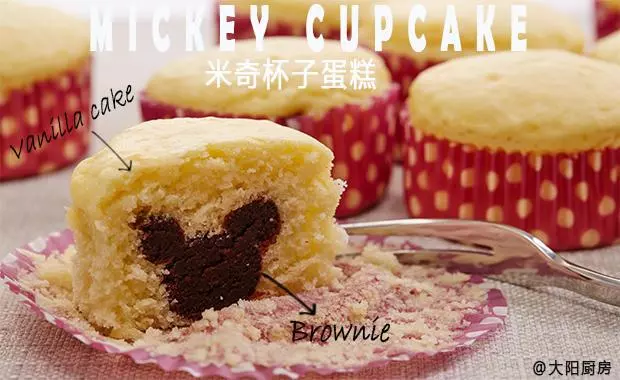
7倒入纸杯中(倒至三分之二处就可以了,烤完蛋糕会膨胀,之后还要加奶油哦)

8放入烤箱中180度15分钟左右。

9放入烤箱中180度15分钟左右。

10烤的时候我们可以来打发淡奶油,200ml淡奶油加入10g砂糖(如果喜欢甜一点可以多加一些糖,这里巧克力蛋糕比较甜奶油的话糖就可以少放一些)。

11用电动打蛋器打发至有纹路就可以了。

12裱花袋装上裱花嘴,装入淡奶油。

13蛋糕上挤上淡奶油。

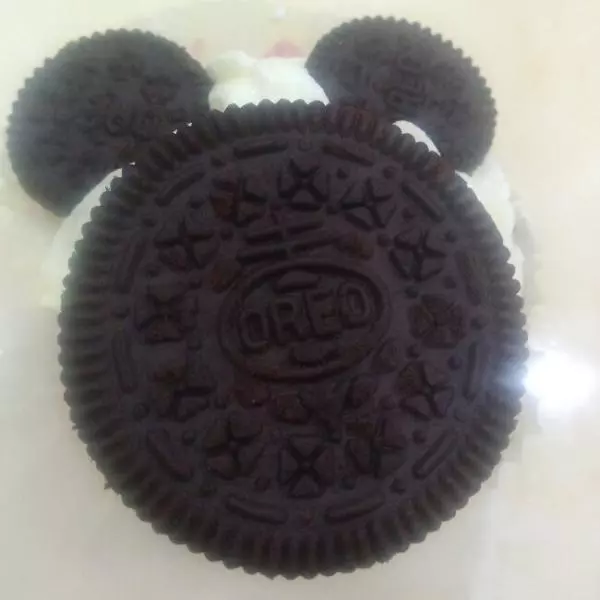
14装饰奥利奥饼干,用奥利奥和迷你奥利奥饼干就可以做出一个米奇头哦。加上蝴蝶结就成米妮啦~

15装饰奥利奥饼干,用奥利奥和迷你奥利奥饼干就可以做出一个米奇头哦。加上蝴蝶结就成米妮啦~

16剩下的一些可以撒上漂亮的糖珠和插片。

17剩下的一些可以撒上漂亮的糖珠和插片。

18欢乐米奇杯子蛋糕就做好啦,开吃吧!

19欢乐米奇杯子蛋糕就做好啦,开吃吧!