原料
鸡蛋: 3个, 黄油: 15g, 牛奶: 250ml, 糖霜: 20g, 淡奶油: 20ml, 低筋面粉: 120g, 馅料制作: , 榴梿: 3大块, 糖霜: 30g, 淡奶油: 250ml
步骤
1我买了一整个儿榴莲,花了270大洋。没忍住,偷吃了一大块榴莲,实际用了三大块榴莲。旁边的大澳芒可以忽略掉。

2鸡蛋和糖霜混合,没有糖霜的可以用砂糖代替。

3牛奶倒入,与鸡蛋和细砂糖搅拌均匀。不用什么手法,顺时针搅拌即可。

4融化黄油。(黄油用吹风机吹化,我试了黄油容易飞溅,所以想了个好办法,微波炉40瓦解冻1分钟即化。)

5融化的黄油倒入鸡蛋糖霜牛奶的混合液体中。再倒入20ml的淡奶油

6这个筛子很主要,接下来就知道筛子的用处了。

7面粉过筛,效果图。

8搅匀,看下图

9搅拌匀了。

10这个很主要,用处是面糊过筛,使面糊更细腻,烙出来的面皮颜色嫩黄。

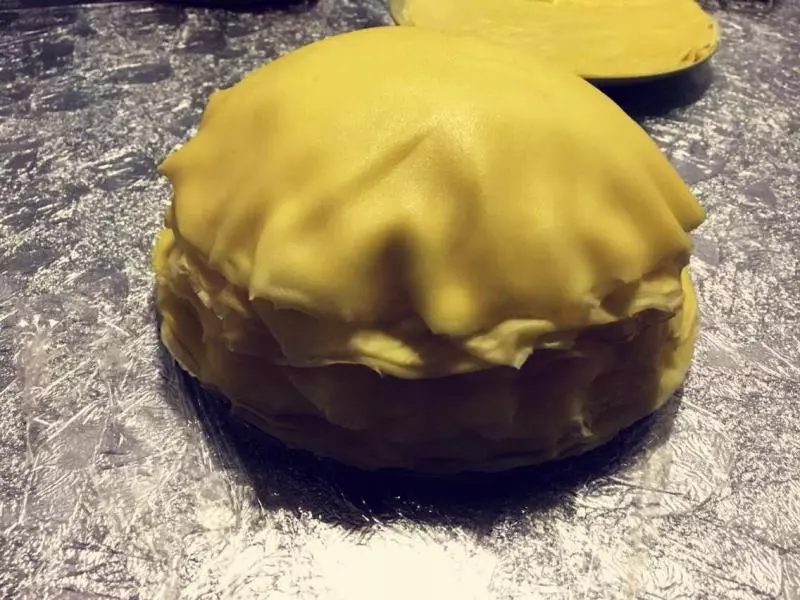
11过了四次的面糊,如图。

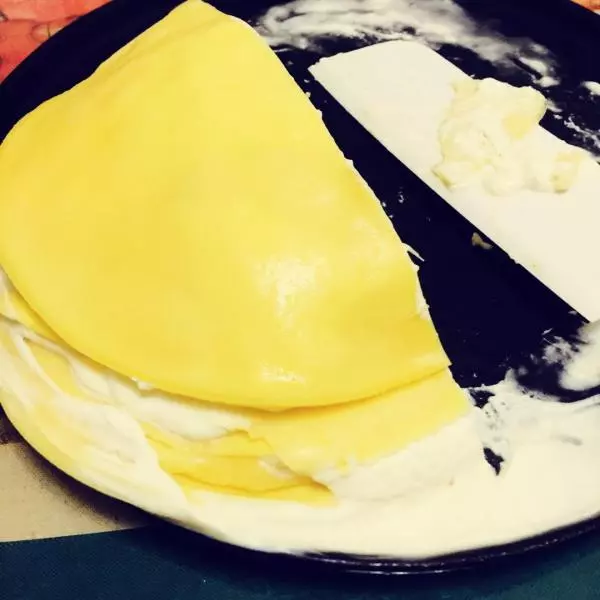
12用不粘锅烙,像摊鸡蛋饼一样。火候一定要掌握好,一定要小火,凝固了再翻面烙一下就好啦。

13这些材料够摊14张6寸面皮。

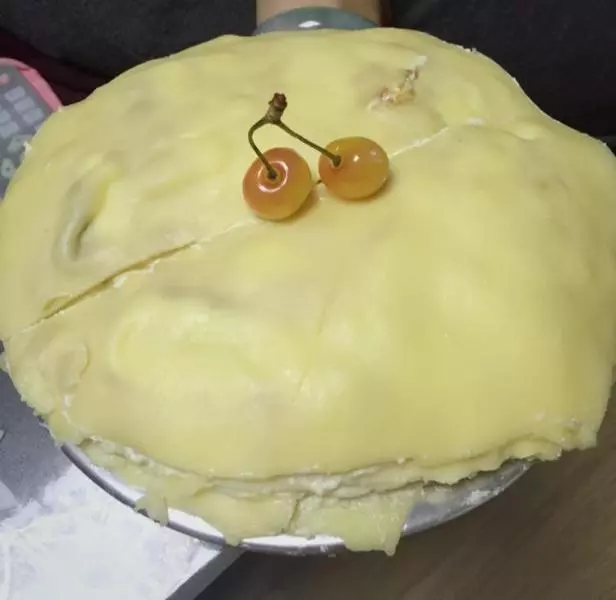
14奶油倒入容器内,打发七分即可(奶油不硬但成型),与糖霜混合搅拌匀。

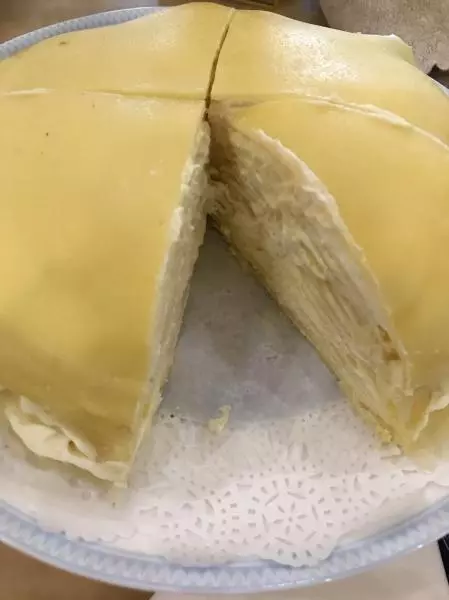
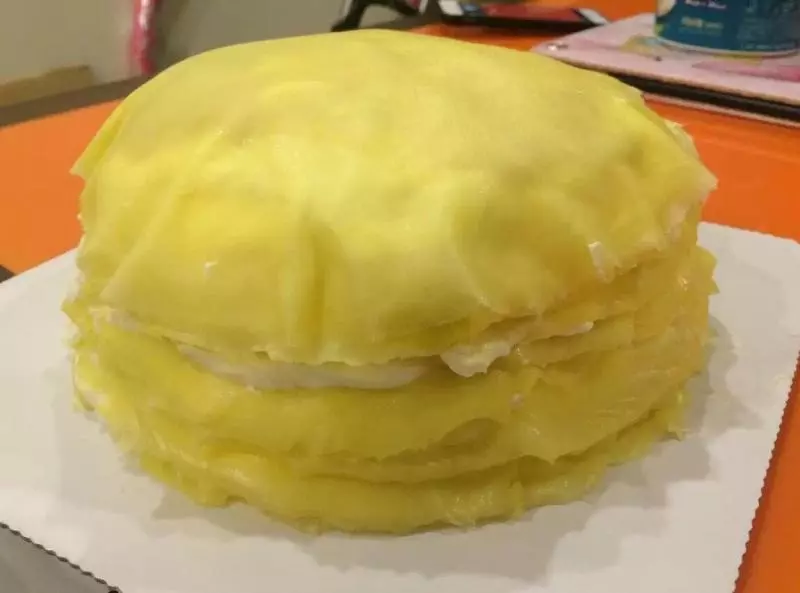
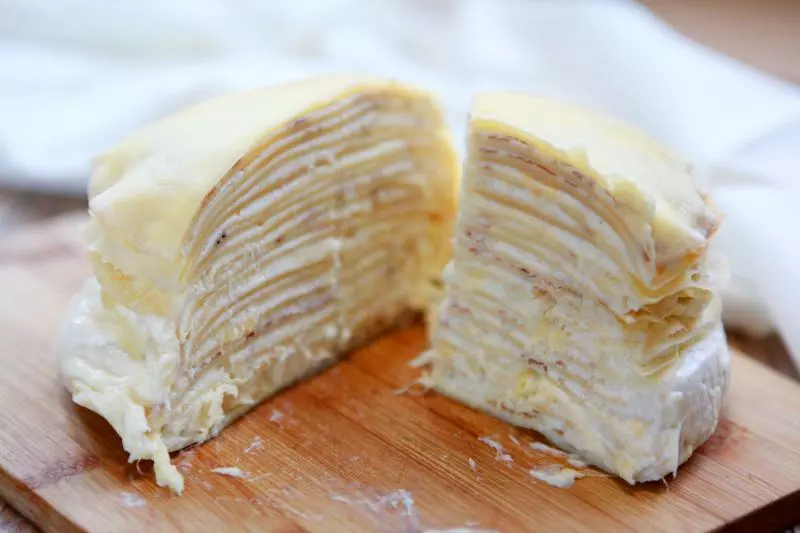
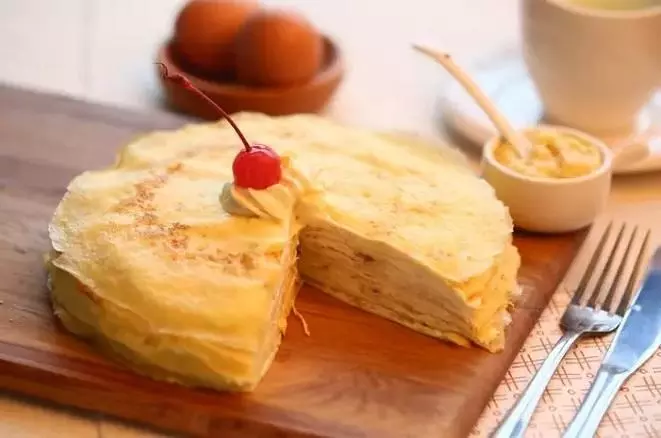
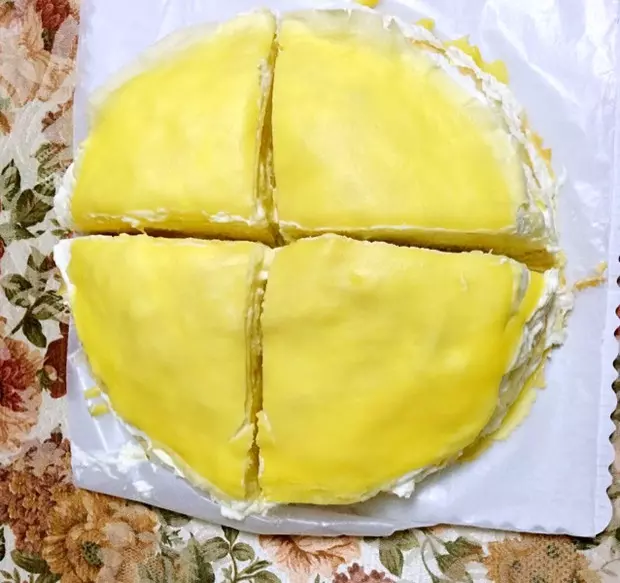
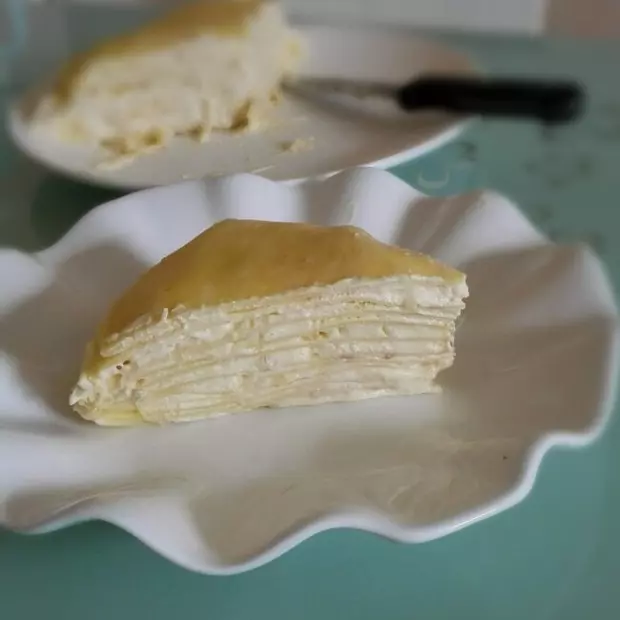
15榴莲搅碎,如果要口感细腻,建议打成榴莲泥状,如果特别喜欢吃榴莲的,打成小块别太碎比较好,不管打成什么样子,与上图中的奶油混合搅拌几下。

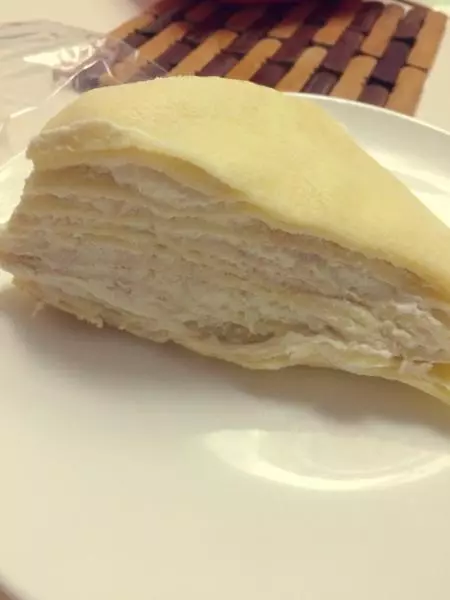
16用汤匙一层面皮一层馅料的抹匀。

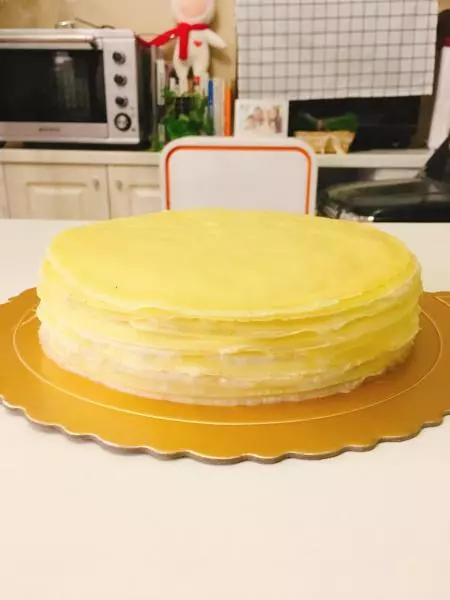
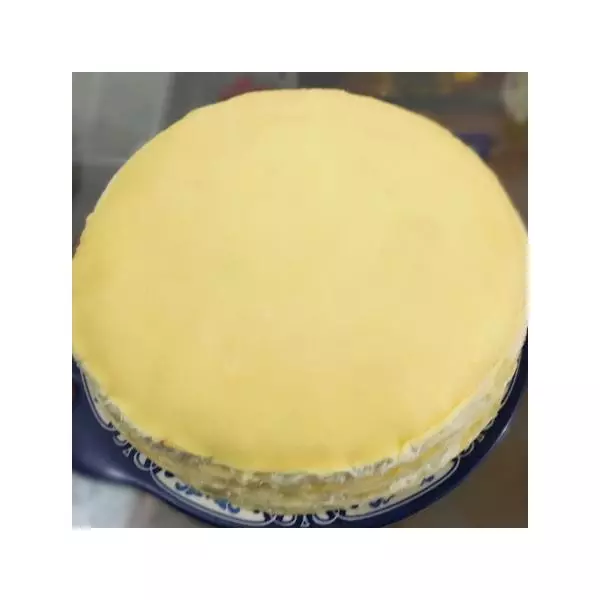
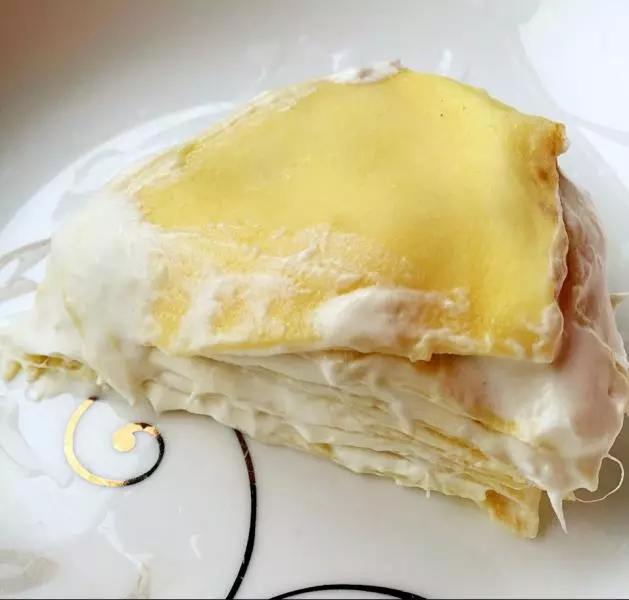
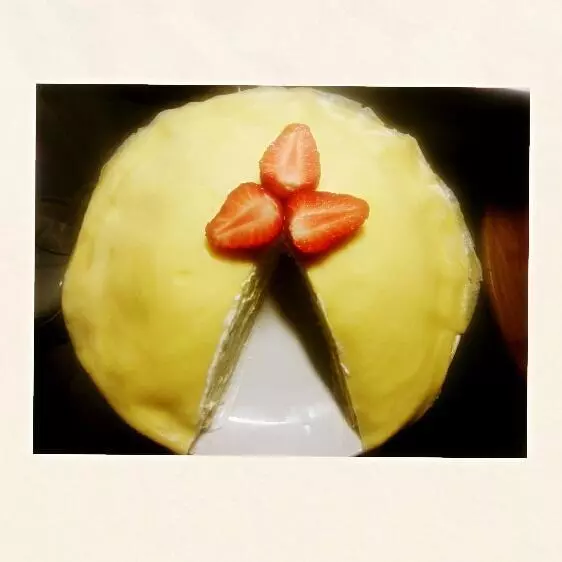
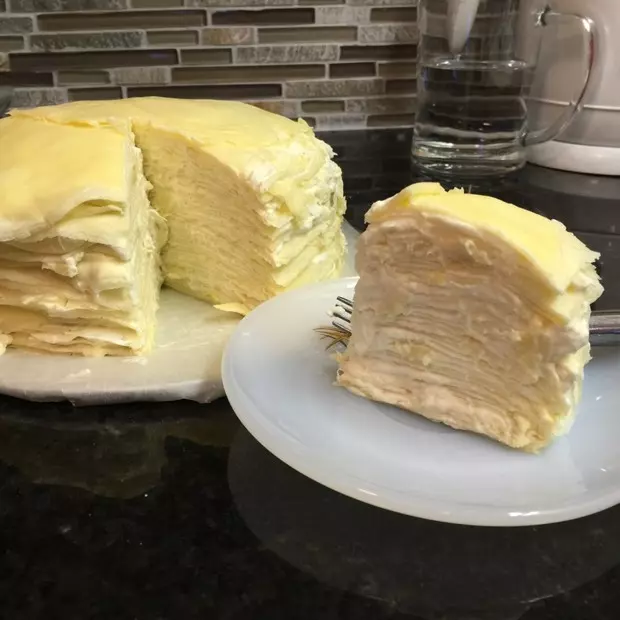
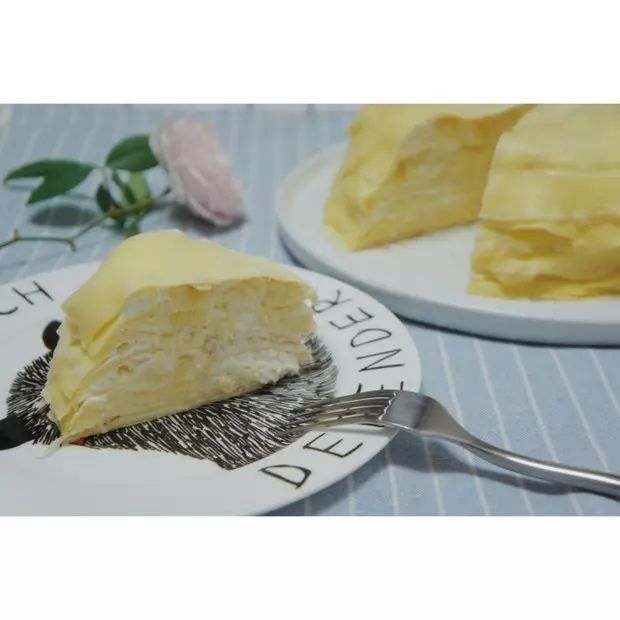
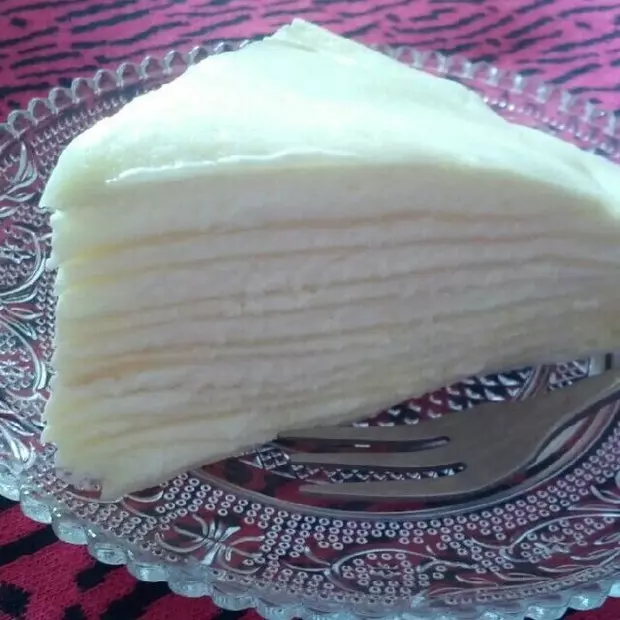
17做好啦,6寸14层榴莲蛋糕。

18好吃。

小技巧
筛子很主要。