原料
抹茶4: 克, 水12: 克, 酸奶60: 克, 玉米油50: 克, 低粉46: 克, 蛋黄5: 个, 蛋白5: 个, 细砂糖50: 克, 柠檬汁2-3: 滴, 淡奶油170: 克, 丘比草莓酱40: 克, 新鲜草莓若干: 只, 姑娘果2个:
步骤
1混合酸奶和玉米油

2蛋抽充分搅拌乳化

3低粉过筛加入

4之字形拌匀,不要画圈圈,面粉会起筋

5分蛋,蛋黄加入面糊中,蛋白分到一个无油无水的高点的盆里

6继续之字形混合蛋黄和面糊,直到细腻,这就是后蛋法,后蛋法会让蛋糕更加细腻

7蛋白加入50克细砂糖,2-3滴柠檬汁,等待打发,我是一次性加砂糖的,并没觉得有什么不妥,一会打发的时候会有注意事项

8抹茶和水,冷水就行,用茶宪或蛋抽混合

9混合好有点粘,一会我们再用面糊稀释一下

10打发蛋白

11首先低速,打起粗泡,也是化糖作用,糖会减慢蛋白的打发速度,先加糖蛋白也会打的细腻些,夏天的话用冷藏的蛋白会比较稳定。说多了~这个状态时改高速打发

12高速打至细腻泡沫,出现大纹路,再改成低速,速度变化只是为了节省时间,小伙伴可以一直低速打,蛋白会更加细腻

13最后的低速一是怕打发过头,容易控制,二是整理气泡作用,避免出现大气泡。最后打发程度是8成发,也就是提起打蛋头会出现小弯钩的状态,因为蛋糕卷需要蛋糕有一定的柔软度,如果打到10成发,那么蛋糕体过硬,一卷会裂开

14再来一张状态

15混合蛋黄糊和蛋白霜,用1/3反加法,先挖1/3蛋白到蛋黄糊里

16翻拌,避免无规律搅拌,一定要优下到上翻拌,边翻边转动盆子

17大致均匀了,就把蛋黄糊那一半加入剩下的2/3蛋白中,还是翻拌,大家实在不懂翻拌,我找了个视频可以参考http://m.youku.com/video/id_XOTIwMTc1NDgw.html?x=1&source=

18拌到细腻,无蛋白块

19分一点面糊到抹茶糊中

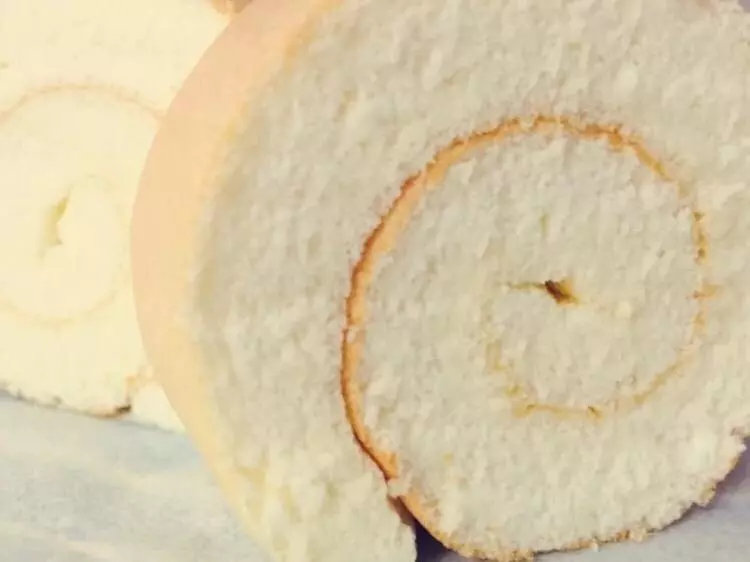
20拌匀,尽量把茶宪上的抹茶甩下来,我用的青岚,好贵的?这样抹茶糊就稀了很多,下一步好拌匀

21加一大坨面糊,量没什么限制,翻拌

22大致翻拌即可,我们本来做的就是大理石的花纹,所以拌匀了就没有花纹了?

23差不多了就把抹茶糊加进整体面糊里

24大致翻两下

25从大概40-50厘米的高度,冲入28×28方盘里,这样是为了防止蛋糕里混入大气泡

26用刮板刮平,这个面糊流动性很好,也可以摇一摇就匀了,我就是摇的?

27摇好了是这样的,四个角有点低,我就刮板稍微整理了一下

28烤箱中层,上火170,下火150,25-30分钟,每家烤箱不一样,要自己判断熟没熟哈,烤箱不分上下火就160度烤

29判断熟没熟,有两种办法,一是手指轻拍蛋糕表面,迅速回弹不会留下手指印就是熟了,不烫的~放心,再就是一个傻傻的办法,插牙签不带出面糊就是熟了,我还是推荐手拍法

30就正这放在晾架上晾凉,会有回缩,是正常的,等冷了我们脱模了还要去边的

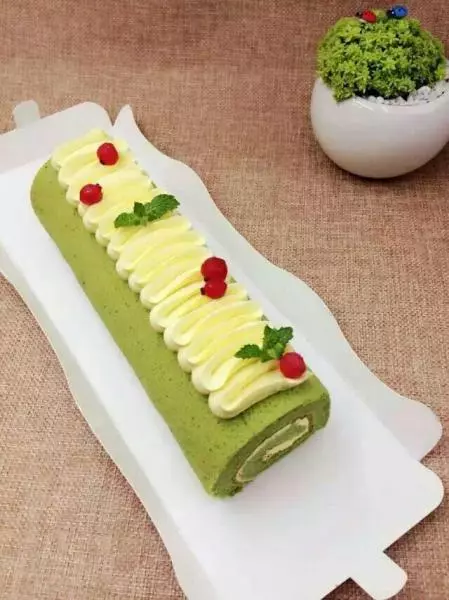
31脱模

32去边

33用两个晾架翻个面,蛋糕太软,直接手翻怕翻坏

34因为要花纹要朝外,所以要把烤黄的这一面卷在里面

35淡奶油加草莓酱打发

36全程低速打发,因为低速打的奶油才会细腻,我是铁塔的淡奶油

37就一点点,做最后装饰,其他的用于卷卷

38我是L型抹刀,抹平,靠近你的一侧抹厚点,因为要夹草莓

39草莓这一排抹厚点,不然卷的时候草莓和奶油之间会有空隙

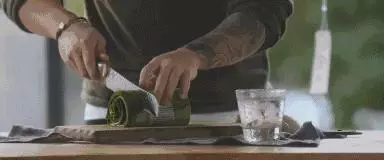
40油纸起起蛋糕片,包住草莓,稍稍用力压一下

41第一折把草莓包住,记得稍微压一下哦

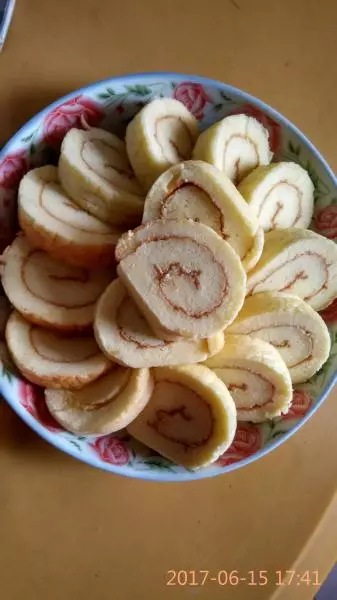
42提起油纸一路卷过去,畅通无阻啊~

43收口朝下,冷藏15分钟定型

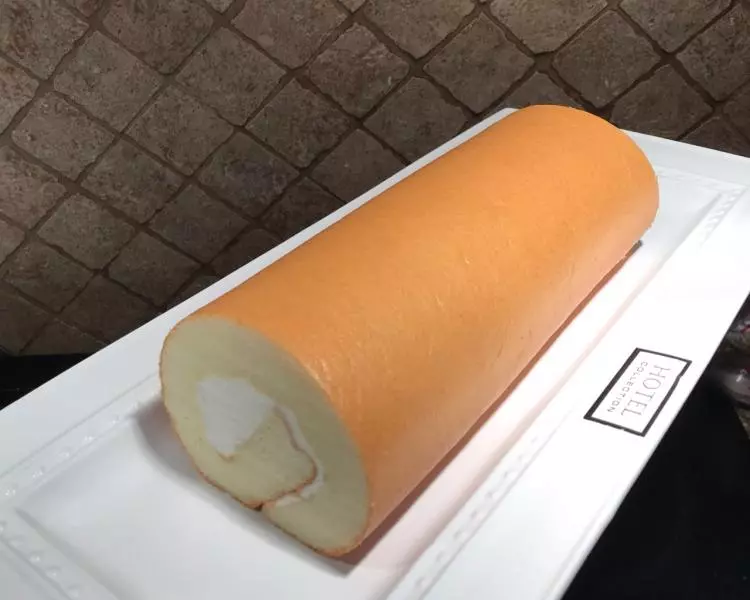
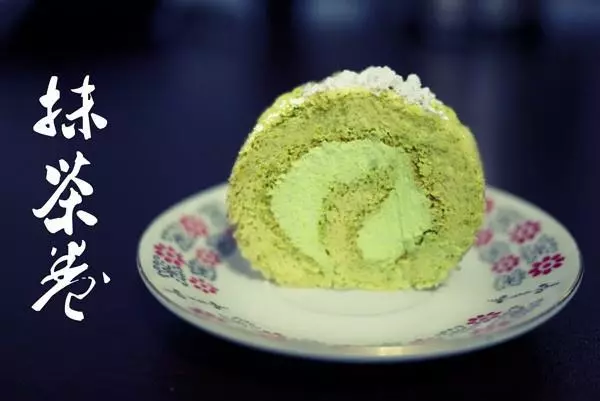
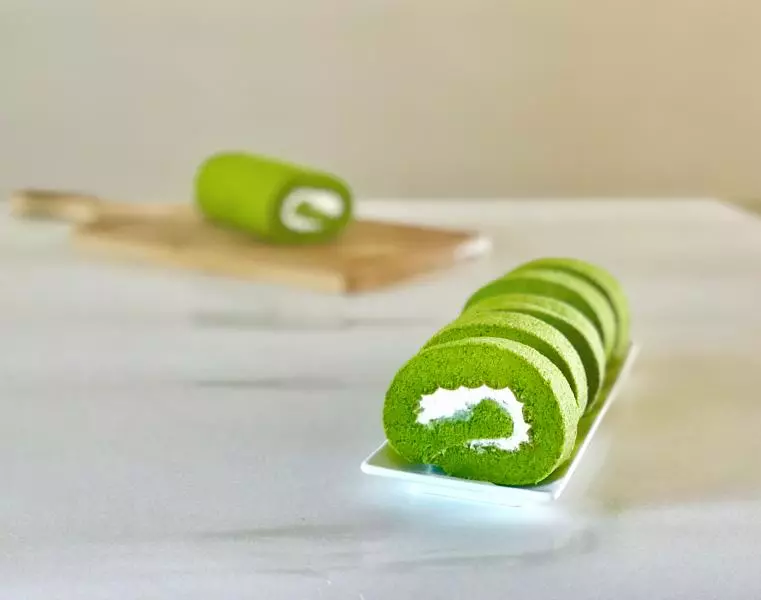
44定制之后切掉两头

45我是切的半卷,用圆口花嘴进行的装饰,因为家里没有圣安娜花嘴,那个才是正宗装饰蛋糕卷的

46特写1

47特写2

48就这了,写的快累死了,都啰嗦完了

小技巧
想做原味蛋糕卷的话就是不加抹茶粉,低筋面粉改成50克就可以了,混合起来也没那么麻烦?