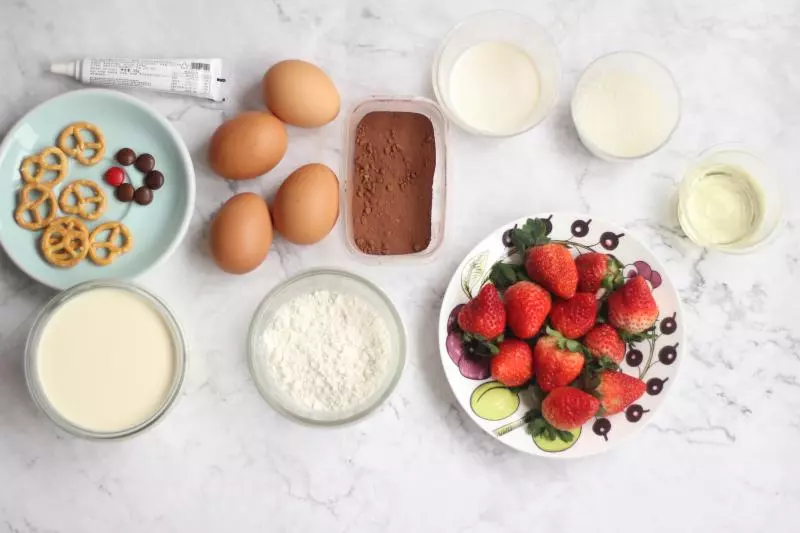
原料
雞蛋(60-65g): 4隻, 牛奶: 50g, 玉米油: 50g, 低筋麵粉: 42g, 可可粉: 10g, 細砂糖: 60g, 淡奶油: 200g, 細砂糖或糖粉: 15g, 草莓: 12顆左右, 黑巧克力筆(眼睛): 1支, M&M豆(鼻子): 4顆, pretzel小餅乾(耳朵): 8塊
步驟
1先準備好所有材料。分離蛋清和蛋黃,蛋清放入冰箱冷藏備用;可可粉與低筋麵粉混合過篩,烤盤內摺疊好墊底的油紙;
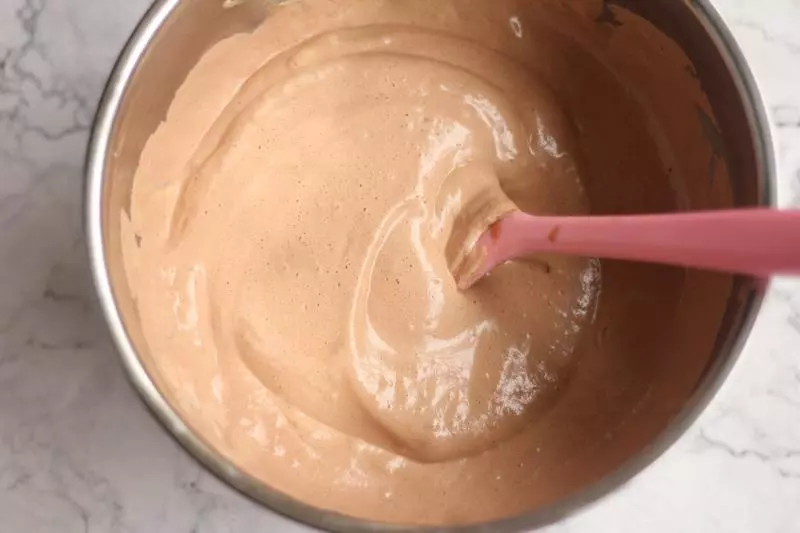
2這次的蛋糕體是用後蛋法製作的。首先混合玉米油和牛奶,用蛋抽不規則的輕柔攪拌2分鐘左右,可以順時針、逆時針、畫Z字交替著來,直到達到牛奶和油完全乳化,呈無大氣泡的細膩有光澤狀態。

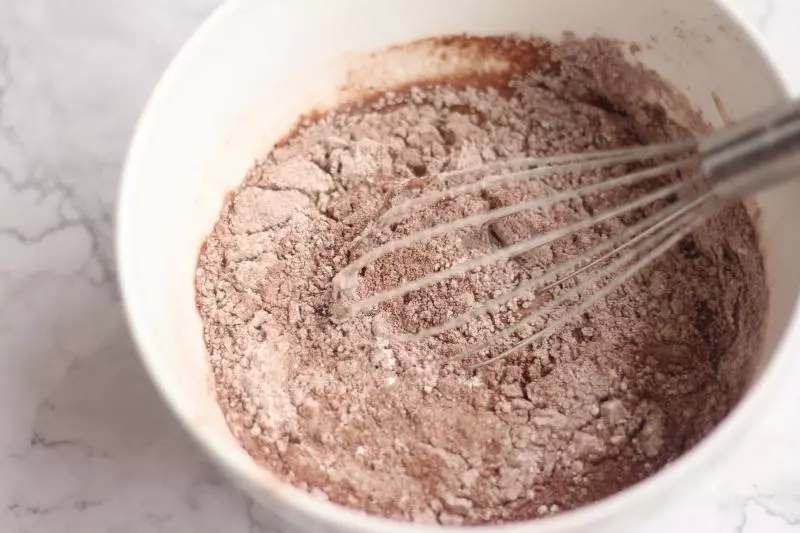
3篩入麵粉和可可粉混合物,用蛋抽攪拌均勻。如果上一步牛奶和油沒乳化到位,這一步可能就會出現水油分離的狀況
4在麵糊內加入蛋黃,一個一個攪拌均勻。此時預熱烤箱上下火170度

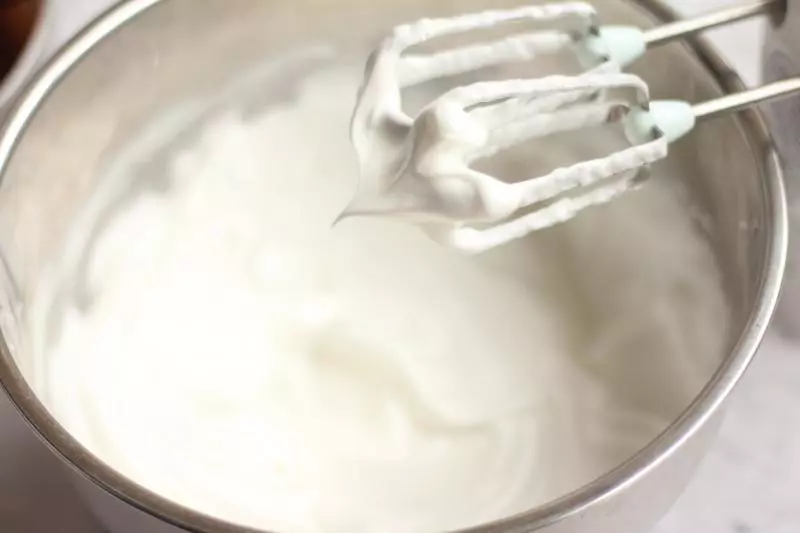
5取出冷藏的蛋清,先用乾淨的打蛋器打到粗泡狀態,然後一次性加入所有的糖打發到提起有小彎鉤的八九分發的樣子,介於濕性發泡和乾性發泡之間的狀態
6用刮刀取1/3的蛋白與蛋黃糊翻拌混合均勻
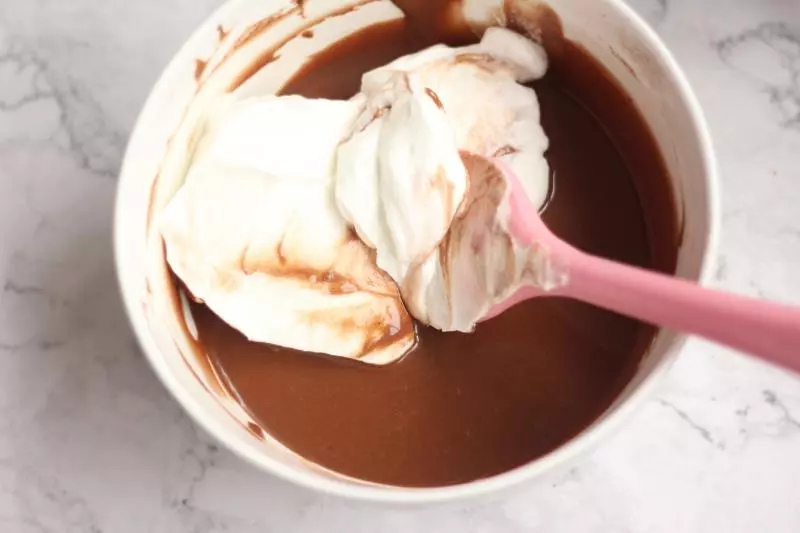
7把步驟6倒回到蛋清中,用戚風翻拌的手法輕柔的翻拌均勻成為蛋糕糊
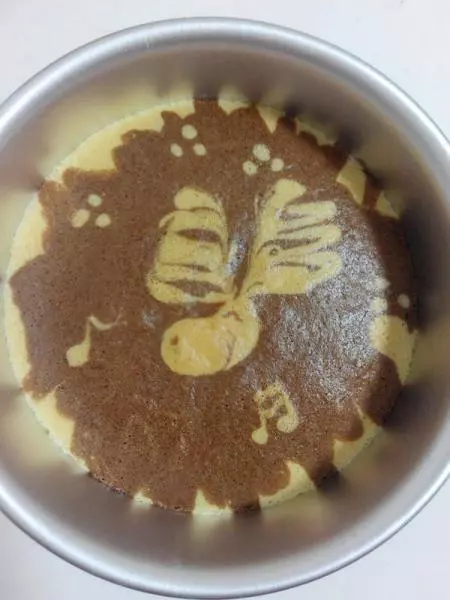
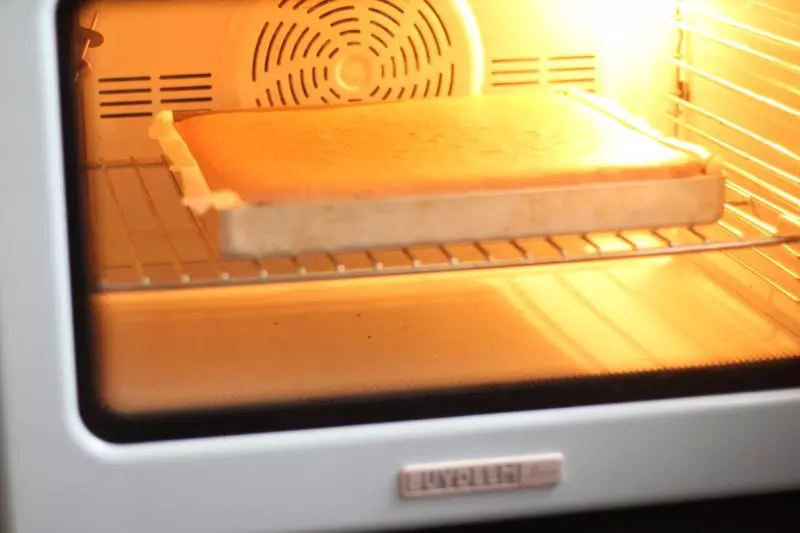
8蛋糕糊倒入鋪了油紙的金盤中,刮平表面,震兩下震走大氣泡,放入預熱好的烤箱中層(我的烤箱層數很多,我實際放的是中間略微偏下那層),170度烤20分鐘。
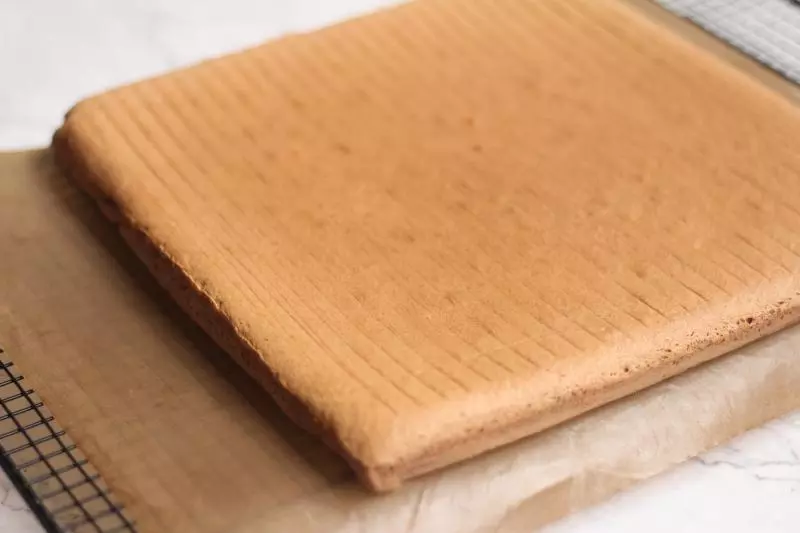
9取出烤好的蛋糕卷,大力震兩下震出熱氣,然後直接倒扣在晾網上,迅速撕去底部的油紙,然後翻過來正面晾涼。因為這個是做正卷,所以我晾的時候正面向上的,避免表皮因為熱氣黏在油布上
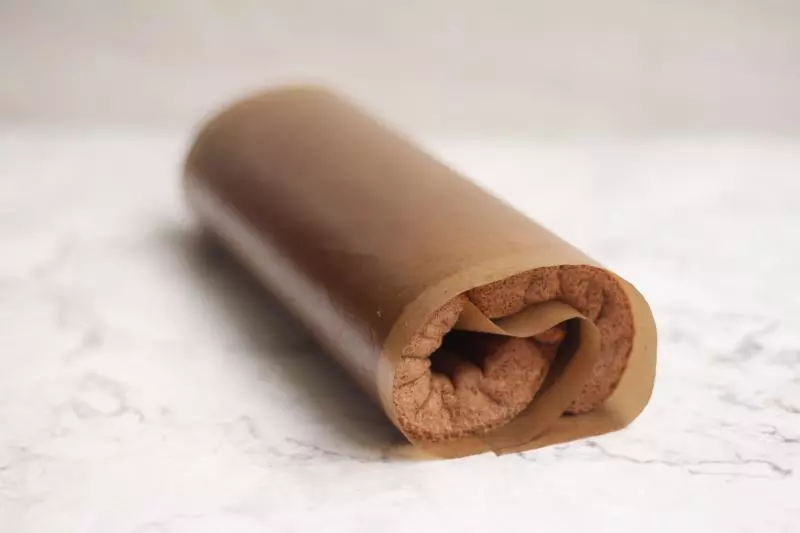
10晾到蛋糕卷摸上去幾乎沒有溫度,但還未完全涼透的程度,藉助油紙把蛋糕體如圖捲起,然後放至完全晾涼。(在內部熱氣已經散去但還完全涼透前卷還是非常柔軟的,此時卷一下最後加了奶油後更容易定型,也不易裂開。)
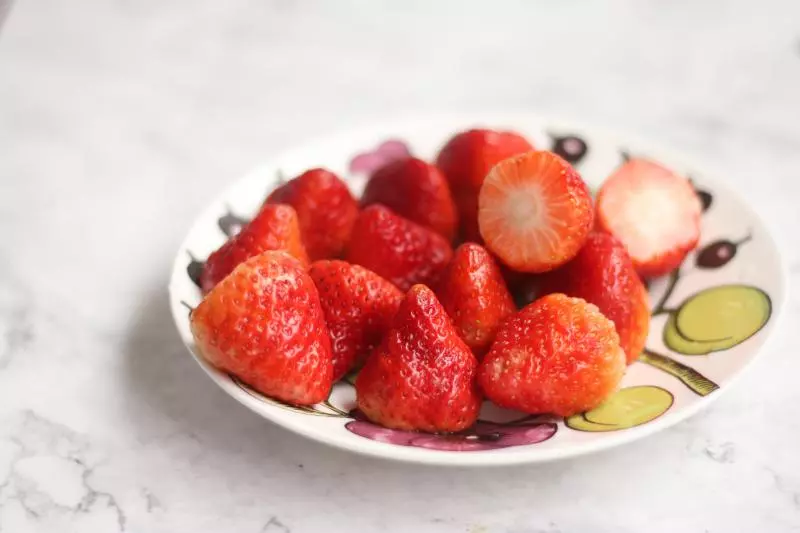
11晾的時候把草莓洗凈,切掉底部的草莓蒂,呈底部平整狀態
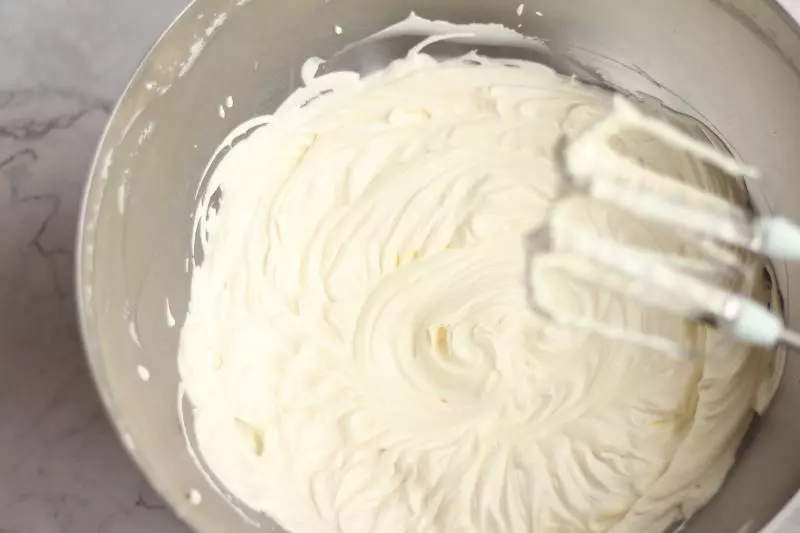
12淡奶油加砂糖或糖粉完全打發到立體有紋路的裱花狀態,留出一小部分奶油作為最後麋鹿頂部的裱花,剩下的做內餡
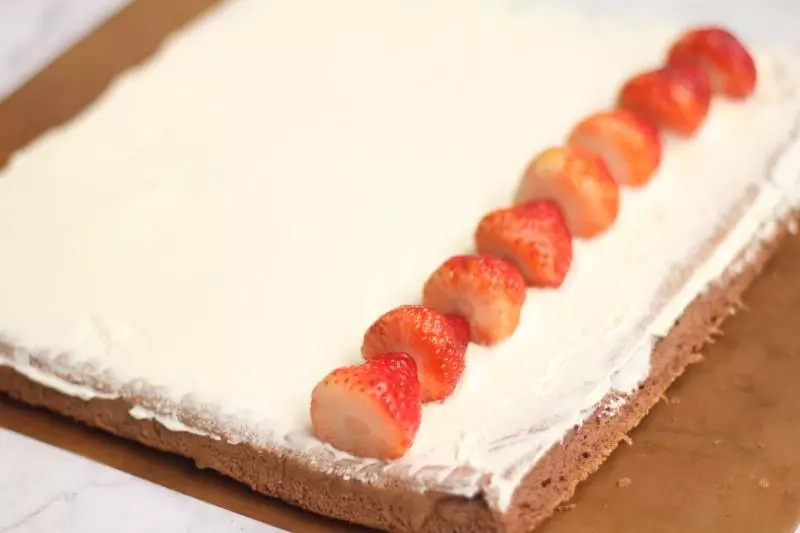
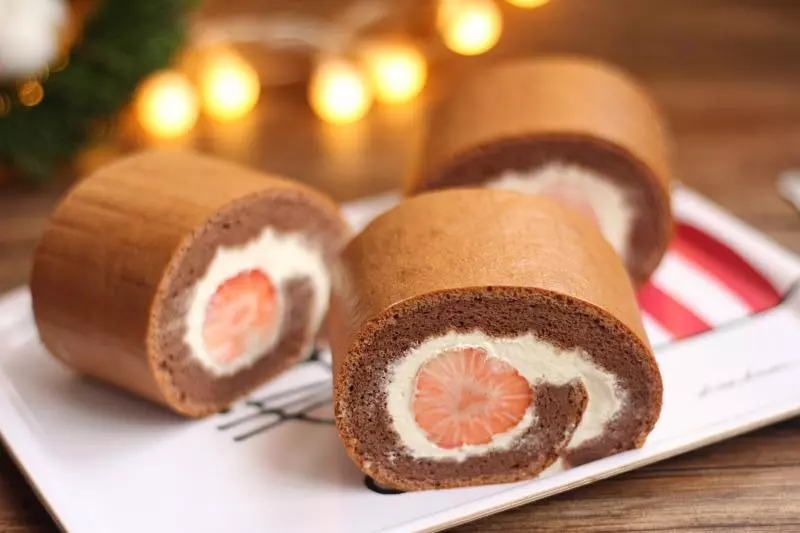
13將冷卻好的蛋糕卷再次鋪開,用抹刀把淡奶油均勻的在蛋糕卷上抹開,右側頂部的奶油可以略多於左側收尾處。蛋糕卷兩側可以略微修剪成斜的狀態,然後將草莓一字擺開在右側奶油較多的部分
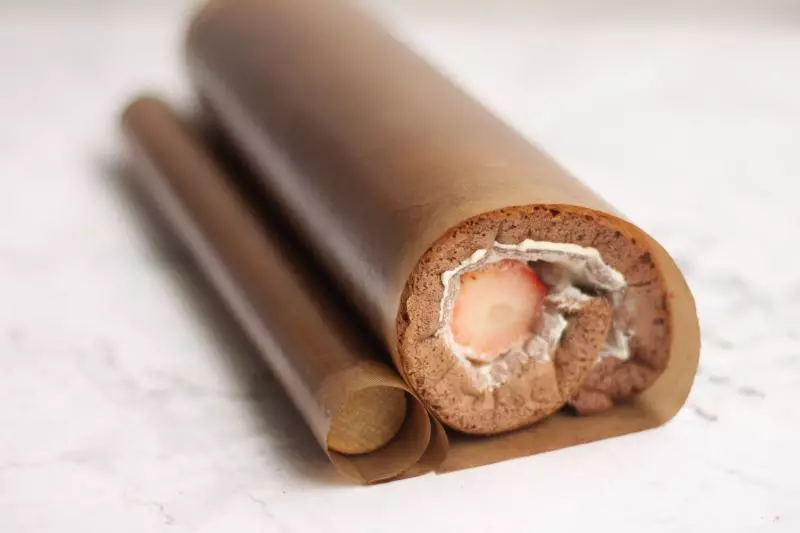
14藉助擀麵杖和油布,從右往左(從擺草莓奶油多的那頭開始向少的那頭卷)將蛋糕卷捲起,卷的時候兩端要同步,過程中注意收緊油布。卷緊實後的蛋糕卷可以用油布/油紙/錫紙包起來放入冰箱冷藏定型半小時以上。
15蛋糕卷切去兩頭兩尾不規整的部分,平均切分成四段
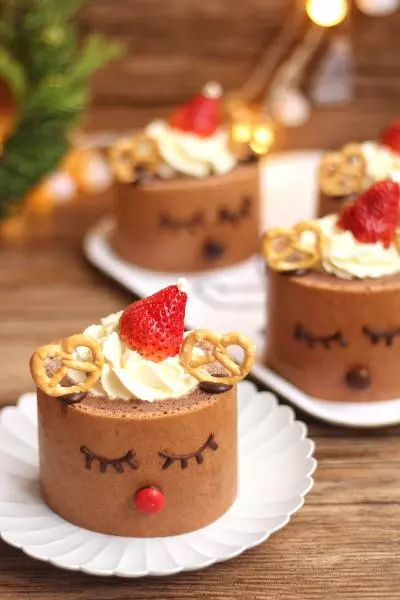
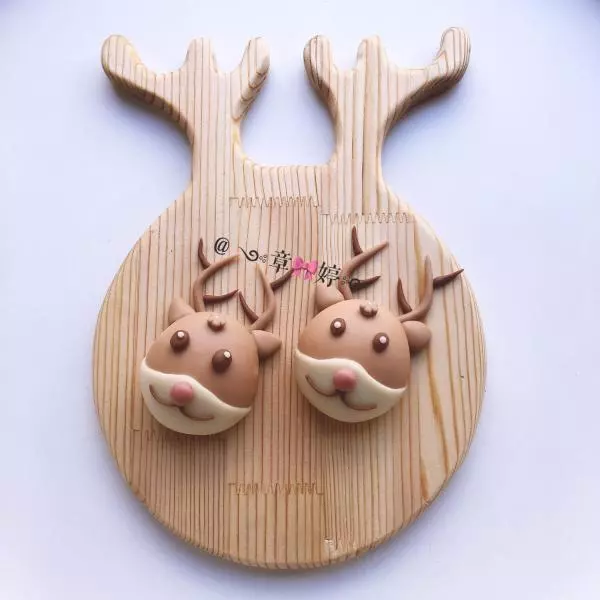
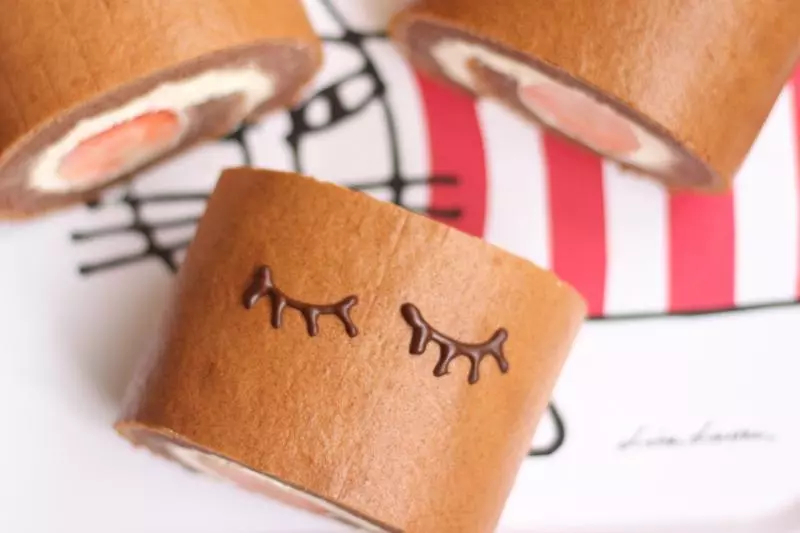
16巧克力筆用熱水泡融化,在蛋糕卷上畫出麋鹿的眼睛。沒有巧克力筆的用裱花袋+融化的黑巧克力也可以。
17在兩隻眼睛下方的中間擠一點巧克力作為粘合劑,然後粘上一顆M&M豆當作鼻子
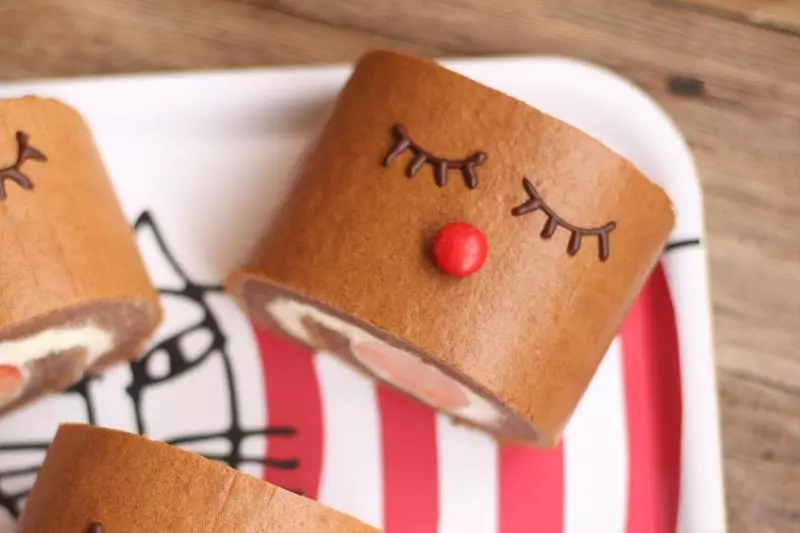
18把蛋糕卷豎起來,在正面的頂部兩側擠上巧克力做粘合劑,然後放上pretzel小餅乾成為耳朵。

19把步驟12勻出來的奶油裝入放了裱花嘴的裱花袋,在「麋鹿」的頭頂擠出一坨奶油,作為「帽子」的底托,然後放上切去底部的草莓,在草莓的尖上沾一個圓形的奶油球,帽子就戴好啦。
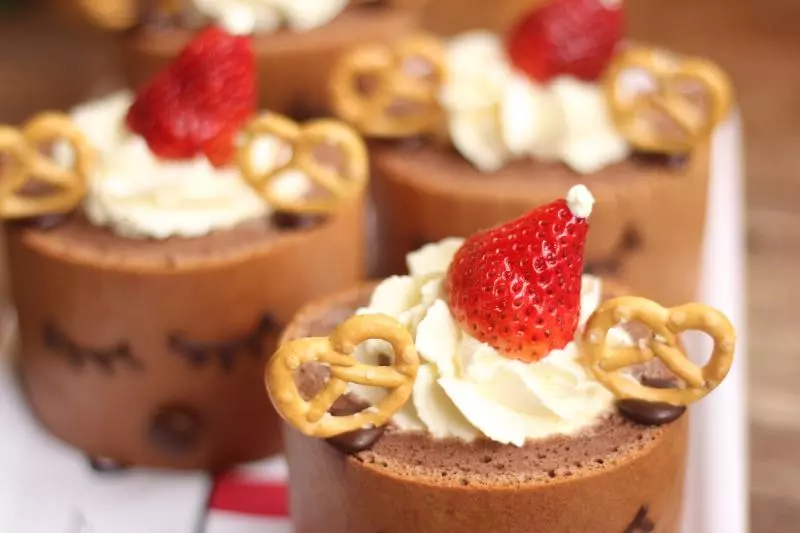
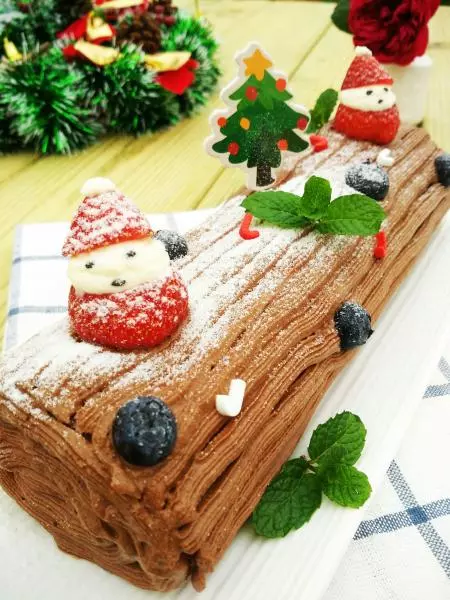
20定妝照~ 帶著紅色聖誕帽的麋鹿蛋糕卷就做好啦。