![](/images/node/20/205325.webp?1638102621)
原料
油紙: 一張, 雙面膠: 適量
步驟
1將A4紙長邊對摺,裁成兩半。一半用來折盒身,一半用來折盒蓋。咱們做這個紙盒裝三明治用一半就好了。
![](/images/seq/68/685113.webp?1638154200)
2將半張油紙沿圖示方向再對摺
![](/images/seq/68/685114.webp?1638154200)
3再對摺
![](/images/seq/68/685115.webp?1638154200)
4打開,留長中線。
![](/images/seq/68/685116.webp?1638154200)
5將上半部對其中線折,打開,留下1/4線
![](/images/seq/68/685117.webp?1638154200)
6展開後可以看到角平分線與中線產生的交點
![](/images/seq/68/685118.webp?1638154200)
7右半部分過交點向左折。
![](/images/seq/68/685119.webp?1638154200)
8將右上角對其1/4線下折,而右下角也對其1/4線上折
![](/images/seq/68/685120.webp?1638154200)
9展開,
![](/images/seq/68/685121.webp?1638154200)
10將上面1/4長條向下折
![](/images/seq/68/685122.webp?1638154200)
11沿摺痕右拉
![](/images/seq/68/685123.webp?1638154200)
12沿摺痕右拉
![](/images/seq/68/685124.webp?1638154200)
13得到如圖所示
![](/images/seq/68/685125.webp?1638154200)
14把中間長條部分向上折,下部的斜摺痕對其中線壓平。
![](/images/seq/68/685126.webp?1638154200)
15下面的摺痕保持不動,上面部分拉出直角。
![](/images/seq/68/685127.webp?1638154200)
16把中間凸起的部分壓到長條下
![](/images/seq/68/685128.webp?1638154200)
17把中間凸起的部分壓到長條下
![](/images/seq/68/685129.webp?1638154200)
18壓平
![](/images/seq/68/685130.webp?1638154200)
19把長條向下翻到背面
![](/images/seq/68/685131.webp?1638154200)
20把長條向下翻到背面
![](/images/seq/68/685132.webp?1638154201)
21壓平
![](/images/seq/68/685133.webp?1638154201)
22翻面
![](/images/seq/68/685134.webp?1638154201)
23將矩形右邊對其左邊折
![](/images/seq/68/685135.webp?1638154201)
24右下角對其中線折
![](/images/seq/68/685136.webp?1638154201)
25沿折出三角形的垂直邊,將右半部分翻折向左,留下摺痕。
![](/images/seq/68/685137.webp?1638154201)
26展開
![](/images/seq/68/685138.webp?1638154201)
27右邊對其左邊折
![](/images/seq/68/685139.webp?1638154201)
28對摺
![](/images/seq/68/685140.webp?1638154201)
29再對摺
![](/images/seq/68/685141.webp?1638154201)
30右邊對齊左邊折,左邊也同樣處理,展開,左右兩邊都得到四個小長條
![](/images/seq/68/685142.webp?1638154201)
31折出四個小長方形的對角線摺痕
![](/images/seq/68/685143.webp?1638154201)
32展開會發現,四個小長條的摺痕與中間兩個小正方形的對角線摺痕方向分別相同。
![](/images/seq/68/685144.webp?1638154201)
33步驟12:翻個面,將上半部分長條豎直
![](/images/seq/68/685145.webp?1638154201)
34正方形對角線拉攏
![](/images/seq/68/685146.webp?1638154201)
35中間形成的三角形壓向一邊
![](/images/seq/68/685147.webp?1638154201)
36再將上邊對其中線壓折
![](/images/seq/68/685148.webp?1638154201)
37打開,從中間壓折
![](/images/seq/68/685149.webp?1638154201)
38將下邊的兩邊也向中線折
![](/images/seq/68/685150.webp?1638154201)
39得到一個小小的菱形
![](/images/seq/68/685151.webp?1638154201)
40將上部向上拉,下部兩邊沿摺痕
![](/images/seq/68/685152.webp?1638154201)
41壓平後,形成一個三角
![](/images/seq/68/685153.webp?1638154201)
42將菱形打開,上方的小三角壓入內側,形成一個三角小袋。
![](/images/seq/68/685154.webp?1638154201)
43先折左邊,將第一根長形沿垂直摺痕向右壓折,剩下三條對角線都同樣的壓法
![](/images/seq/68/685155.webp?1638154201)
44右邊的同左邊的類似,把對角線沿垂直摺痕向左壓折。
![](/images/seq/68/685156.webp?1638154201)
45把折出的部分塞進三角小袋裡
![](/images/seq/68/685157.webp?1638154201)
46再調整接合的口,使正反面都能接合在一起,用雙面膠固定接口。
![](/images/seq/68/685158.webp?1638154201)
47再調整接合的口,使正反面都能接合在一起,用雙面膠固定接口。
![](/images/seq/68/685159.webp?1638154202)
48再調整接合的口,使正反面都能接合在一起,用雙面膠固定接口。
![](/images/seq/68/685160.webp?1638154202)
49將背面上方的角向里凹進
![](/images/seq/68/685161.webp?1638154202)
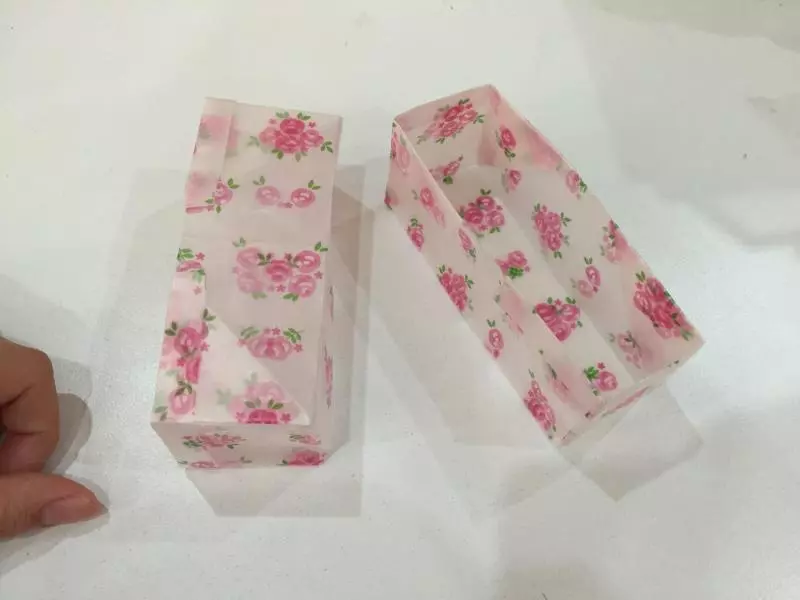
50這樣,盒身就做成了~\(≧▽≦)/~ 五十步,有沒有看花眼~
![](/images/seq/68/685162.webp?1638154202)
小技巧
看著比較麻煩但是熟悉了就會覺得好簡單很順手的~