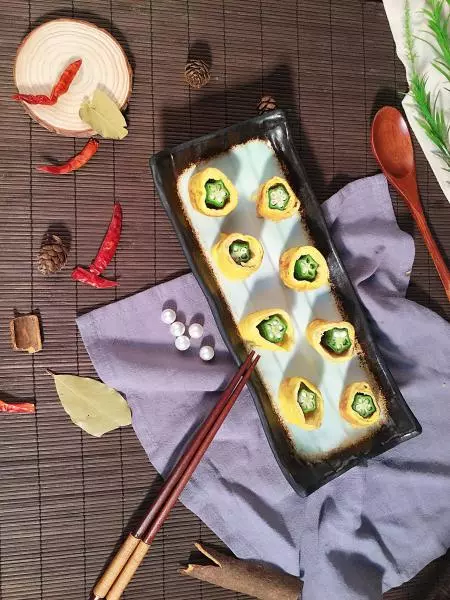
原料
秋葵: 6-8个, 鸡蛋: 3个, 水: 适量, 盐: 适量, 食用油: 适量
步骤
1秋葵洗净,开水烫熟

2切去两头留中间,保留粗细一致部分即可

3鸡蛋打散后加一点水和盐搅拌均匀

43.平底不粘锅倒入食用油,加热

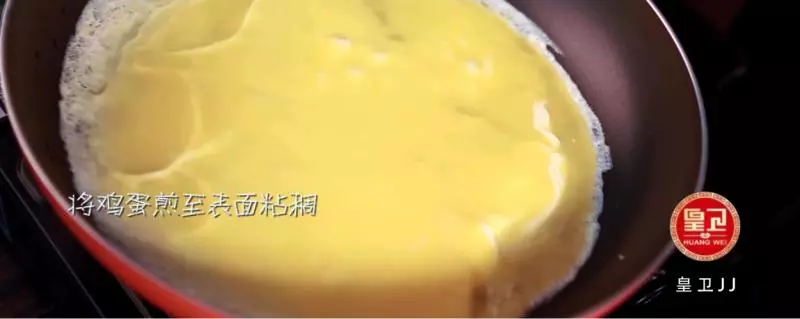
5倒入四分之一蛋液,将锅端起摇晃,使蛋液呈薄饼状,关火
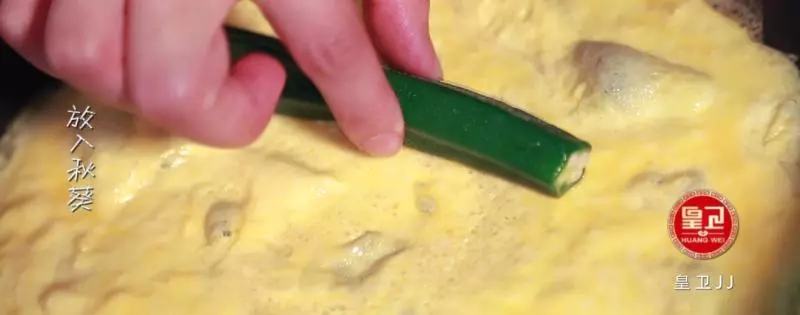
6趁着蛋液未干,将秋葵放在蛋饼的一侧,由一头卷起
7尽量卷紧,卷好后再开小火几个面翻着煎一会儿定型,用铲子小心抬到菜板上,接着再做下一张。

8卷好的鸡蛋卷,样子不错吧!!

9都做好后用刀切成1.5厘米厚的段装盘即可

小技巧
1.煎的时侯一定要注意火候,不能火太大,鸡蛋表面一定不能太硬,才能放秋葵,卷的时侯尽量用两个铲子去卷这样好定型。 2.如果煎鸡蛋的时侯,鸡蛋鼓了小泡形成一个小洞可用蛋液尽量填补。 3.鸡蛋里面加水不宜太多,否则煎的时侯会不粘稠。